


How to setup TeamSpeak Server on Linux
If you don’t know what TeamSpeak is, its basically a Voice Chat application. Read more details here: TeamSpeak Details
Installing TeamSpeak Client is pretty easy however setting up TeamSpeak Server requires some technical knowledge.
Requirements
- VPS
You must have a Virtual Private Server for this setup.
This installation is tested on CentOS 32bit Linux Server.
Buy a VPS with at least 512 RAM from any VPS sellers online.
Once purchased, you will be given an IP address, Username/Login and Password for your VPS.
Note: TeamSpeak Server can also be installed on DSL connections but it is not preferred. - Root Access
Installing programs on Linux require root privileges.
Root account in Linux is same as the Administrator account in Windows.
Root user has complete control of the VPS. - Linux Commands Knowledge
Basic knowledge of Linux command-line is required.
Linux commands are very very powerful which means a mistake of even a single character can delete all your files completely!
Also, there is no Recycle Bin or Trash in Linux which means the chances of recovery are nearly impossible.
So make sure you know what the command does before executing it on VPS.
Installation Steps
- Download PuTTY
If you are using Windows, you will need an SSH Client like PuTTY that lets you connect with your VPS.
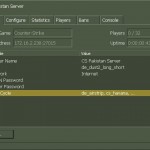
Download PuTTY from here PuTTY.exe - Login to VPS
Once you have downloaded PuTTY, open it and you will see the screen below:

Enter your VPS IP address in Host Name field and press enter.
A black console window will open asking for the username.
Enter your username (which should be root) and press enter.
Now it will ask for your password like below:

Enter your password and press enter.
Note that your password will not be shown as you type it so don’t get confused.
Once you have logged in, you will see something like below:

- Server Installation
Write the following commands in PuTTY console one-by-one:
groupadd teamspeak

useradd -g teamspeak teamspeak -s /sbin/nologin

cd /home/teamspeak

wget http://dl.4players.de/ts/releases/3.0.11.1/teamspeak3-server_linux-x86-3.0.11.1.tar.gz

tar -zxvf teamspeak3-server_linux-x86-3.0.11.1.tar.gz

chgrp -R teamspeak /home/teamspeak

chown -R teamspeak /home/teamspeak

screen -A -m -d -S ts3 su -c "./ts3server_startscript.sh start" teamspeak -s /bin/sh
After you have executed all the commands without getting any errors, the TeamSpeak Server should be started successfully in background. - Start TeamSpeak Server on Startup
TeamSpeak Server does not automatically starts when your VPS is restarted.
To start the server automatically on startup, execute the following commands:
echo cd /home/teamspeak >> /etc/rc.local

echo screen -A -m -d -S ts3 su -c "./ts3server_startscript.sh start" teamspeak -s /bin/sh  >> /etc/rc.local
Now your TeamSpeak server will automatically startup after crash or reboot.
To make sure everything is running fine, connect to your newly setup TeamSpeak Server by download TeamSpeak Client from here TeamSpeak Client for Windows
Installation Problems:
If you face any problems while setting up TeamSpeak Server on your VPS, just write in comments. We will find a solution and update this post!


[…] (Virtual Private Server). If you want to setup on VPS, read this post for hints on setting up VPS Setup TeamSpeak Server on Linux If Linux is not your primary OS, you can install Linux on a VM (Virtual Machine). Simply download […]
Bhai slots 20 kr de ya phr Virtual box sy utar de windows pr kr de bht lag hta hy trust me
Done already 🙂
Just wait until the server restarts!
T h a n k s :*
How to setup the ts3 server on windows ?
Try the steps on this link: http://forum.teamspeak.com/showthread.php/63164-Complete-guide-to-setup-a-TeamSpeak-3-Server-on-Windows-desktops
I haven’t tried them myself so I am not sure if they work.
Please let us know if they work for you 🙂
Thanks For Guiding Thats All Work Successfully
:3 😛 :V 😀 🙂 “) 🙁 :/ :* :2 :1 :4 :5 ;6 :6 :7 :8 :* :0 -_- O.o
You are welcome brother!
I am glad it worked for you 🙂
yaar bro panel vps kese bnaey ga plz bta duo
when i execute all commands it does not give me panel user and pw plzz help me
Brother i have Added Those Commands But what is the Port of the ts3 Server and How can Set the Admins in ts3 server ?
TZ brother when i connect the putty here’s a error connection time out .. How to resolve it ????